.png?version=10)
Choosing a Indoor Trainer
Training, September 29, 2022
Choosing an indoor trainer for your training program can be a confusing and complicated process. Continue reading to get a Coles Notes version of the different options on the market.
Many parts of North America have harsh winters which don’t allow mountain bikers to comfortably ride outside for several months of the year.
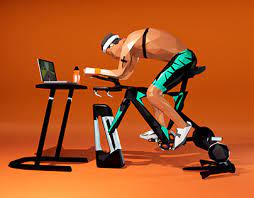
Pedalling away in your garage or basement during the winter months is a necessary evil to many cyclists who crave the adventure to be found riding in the mountains during long summer days.
Getting the most out of your indoor riding experience is important to help you stay committed to your program. Coming out of winter with a great base of endurance makes all the hours and sweat dripping on the floor worth it.
It isn’t as simple as spending the most money or getting the best budget option because each rider will value different things in their decision to purchase and continue to ride on their set up.
The world of indoor trainers is vast and complicated and I cannot pretend to know everything about each product considering the different standards in trainers, bikes, online apps, and sensors that measure speed, heart rate, cadence and power.
Indoor trainers can be broken down into a number of categories. I will do my best to describe the pros and cons of each category.
I will also include my own personal set up based on my own preferences.
Smart vs Non-Smart Trainers
A smart trainer refers to a trainer that has the ability to connect to software to give a virtual training experience. It also has the ability to record your power data and even control the resistance of the trainer to make sure you follow structured training rides to a 'T'. Requires the trainer to have a charged battery or always be plugged in to use its connectivity and control the resistance.
Non-smart trainers do not have the built in ability to connect to software, do not measure power and adjusting resistance comes down to changing gears or a mechanical remote that you put on your handle bars. Almost all models do not need a power source to operate.
Below I will continue about the different styles of trainers which will include both smart and non-smart.
Rollers
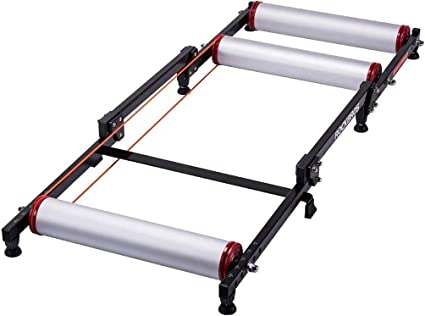
Rollers are a set of cylindrical drums that your wheels spin on top of. You are required to balance your bike within the frame because your bike is not attached to the unit. There are a models that your front fork attaches to and the rear wheel spins on roller.
Pros
- They produce a realistic ride feel
- Are great for improving pedalling technique as the feedback from the rollers is noticeable if you are pedalling squares
- Can be found for cheap
Cons
- They are generally tricky to get going and maintain balance on.
- There are few models that offer connectivity.
- Mountain bike tires do not work well on them as the knobs make the ride bouncy. A road bike with slick tires is best.
Price range: $180 to $1,345
Wheel-On Trainer
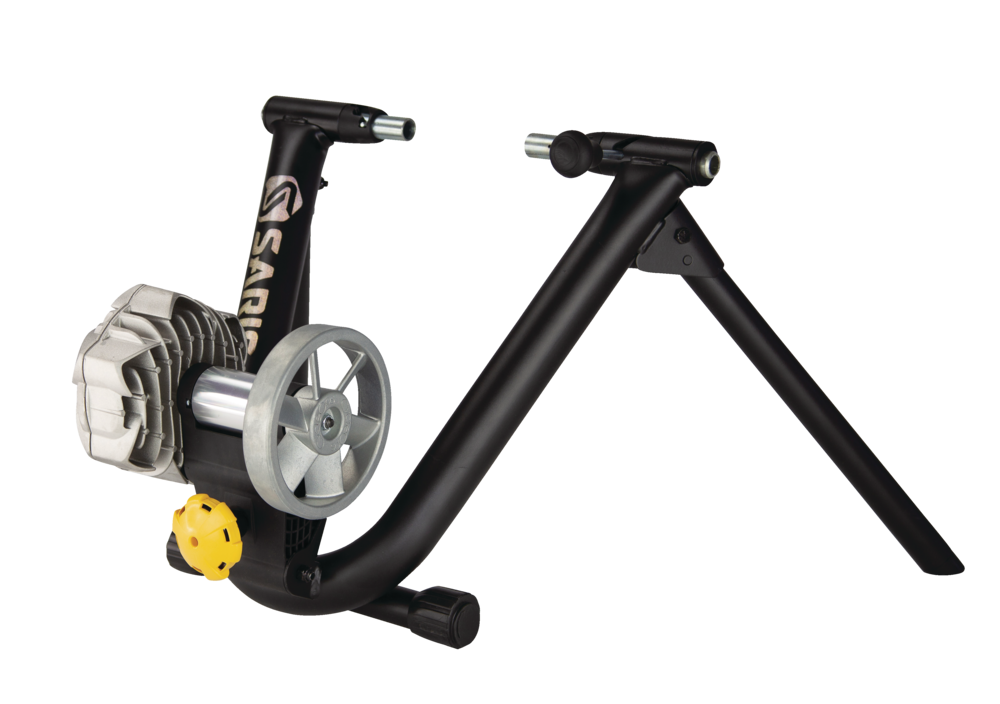
A very common design which does not require you to remove your wheel, although a slick trainer tire is needed since the drum will wear down knobby tires or softer rubber on your road bike tires leading to frequently replacing tires. Resistance is provided either through a fluid flywheel, magnetic or friction from a rim drive unit.
Pros
- Less expensive than a direct-drive trainer.
- Easily mounted to almost any bike.
- Most models fold up for easy storage.
- High-end models offer app connectivity.
- Fluid resistance models are very quiet.
- Rim Drive models allow you to keep your knobby tires on.
Cons
- Not quite as smooth or stable as a direct-drive trainer.
- Causes some wear on your wheel and tire. Usually need a special trainer tire
- Low-cost models can’t connect to apps for an immersive experience. (Some models can add a sensor to gain basic interactivity.)
- May have limited adjustment of resistance for not smart models
Price range: $200 to $700
Direct Drive Trainer
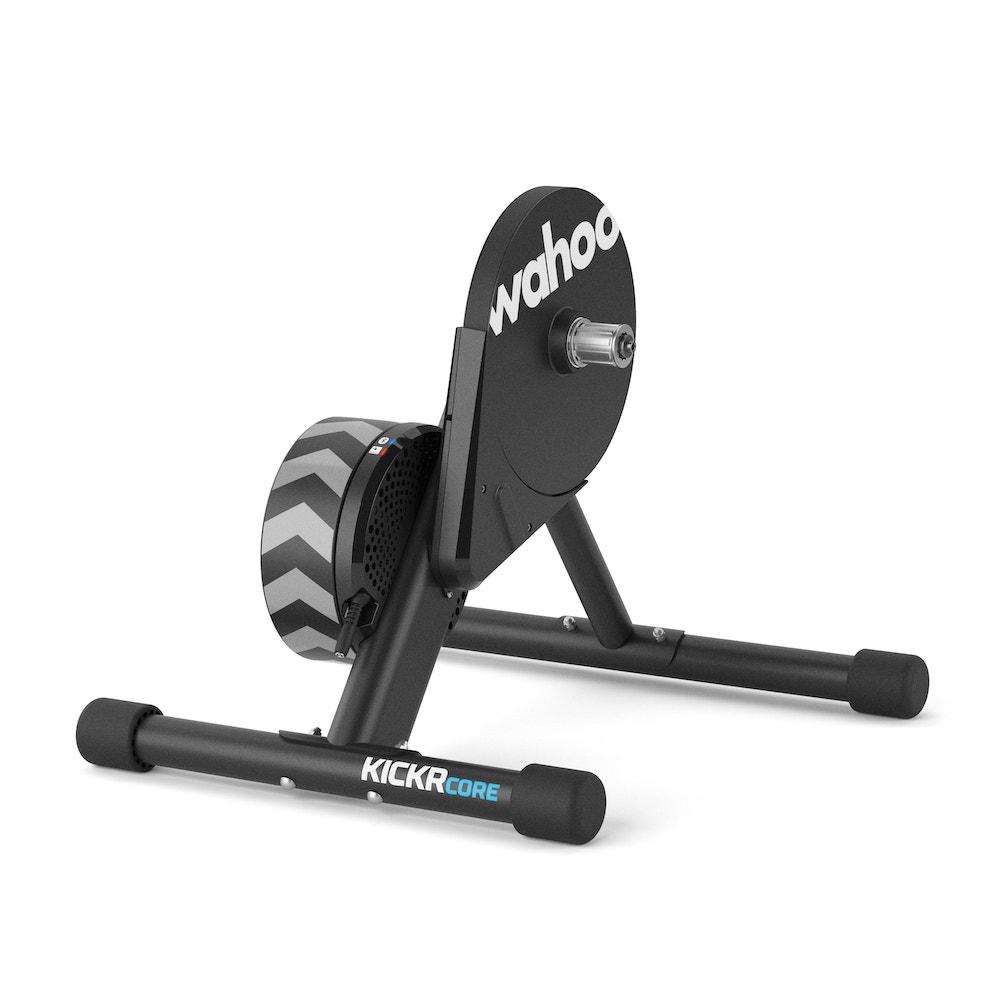
Attach your bike to the unit by the rear dropouts. Currently seems to be the most popular option for indoor riding.
Pros
- Better mimics a natural ride feel than a wheel-on trainer.
- Offers quieter operation, greater resistance control and a more efficient power transfer.
- Nearly all direct-drive trainers also offer wireless app connectivity with power and cadence and speed data delivered to the app.
Cons
- More expensive than wheel-on trainers.
- Attachment setup is more complex, taking your bike on and off is not very quick
- You will sometimes need to buy a separate rear cassette that’s compatible with the trainer
- Can come across compatibility issues depending on your bike and drivetrain
Price range: $500 to $2,000
Stationary Bikes
There are 2 kinds of stationary bikes. The totally basic spin bikes you see at spin studios and high end bike simulators. Don’t count out a basic spin bike though. They are cheapish, effective and paired with a heart rate monitor you have enough to follow a structured training plan. I have had a number of clients successfully use spin bikes in their programs.
Bike Simulators

Pros
- Bike simulators offers a real-world cycling feel
- Whisper-quiet operation
- Training app connectivity
- Durable and have many adjustable features to get the perfect fit for multiple riders
- Your own bikes stay ready to ride outside.
Cons
- The price is every bit as premium as the performance.
- Heavy and awkward to move, especially if there are no wheels on the base.
Price range: $1,500 to $4,000
Spin Bikes

Pros
- Cheap
- Durable
- Simple to get on a start. Only need a stop watch, heart rate monitor, and knowledge of the RPE scale
Cons
- Can lack adjustability depending on the model
- Heavy and awkward to move, especially if there are no wheels on the base.
- No connectivity
Price Range: $200 to $1,000
Considerations before purchasing
- Price: The least expensive options are “non smart”, which is fine if you’re looking to save money and/or just want a simple, efficient workout option . Direct-drive models offer a leap in performance but come with a higher price tag. Bike simulators will be an even bigger leap in price.
- Connectivity: For most people, the real-time workout data along with the social (ie. Zwift) and other virtual riding features that come with connectivity to training apps are important.
- Bike fit: Trainers can fit a wide range of bikes, but you need to double check if your bike will fit. Sometimes you must use a road/gravel bike since not all mountain bikes are compatible with every model of trainer. If you want to use your mountain bike you will be limited to what kind of trainer you can use.
- Additional Costs: Many direct drive trainers require you to buy a rear cassette that’s compatible with your bike’s drivetrain. Also, any smart trainer will need a subscription to an app or Garmin head unit to control it.
- Noise: Trainers have gotten much quieter over the years. Some may be louder than others. How important this is to you will depend if you want to watch TV or not bother your downstairs neighbour.
As you can see the world of bike trainers is complicated. I hope this article has helped educated you on the options out there and can help you start narrowing down the direction you want to go with you indoor training set up.
When you now what options you value for you indoor set up it is best to discuss with your local shop on which brands and models will fit your needs and budget best.
My Personal Set Up
With all of my knowledge on training for cycling and the pros and cons on the indoor trainer market, what do I choose to use?
As will most things, my highest priorities are simplicity and value when it came to choosing my set up.
I actually have 2 wheel on units because of a warranty experience that has given me the fortune to have a non-smart fluid trainer and a wheel on smart trainer. Both are made by Saris and fit on the same frame so I can quickly swap the units to best suite what I want for that ride.
I also have a very cheap set of rollers I bought used for the occasional challenge of balancing on rollers during low intensity rides.
I almost exclusively use my road bike on the trainers as I feel a road bike is best suited for indoor riding. I have a crank mounted power meter that connects to my Garmin head unit. I sync my workouts to my Garmin to follow along with my power meter and heart rate monitor. When I am using my smart unit my Garmin will control the smart trainer.
All of my data is uploaded to Garmin Connect which then syncs with Strava, Training Tilt, and Intervals.icu automatically.
Since I follow workouts on the Garmin head unit, I do not use a software like Zwift to connect to my trainer. This saves one step of connecting and less chance of my workout being delayed by connectivity issues. If my workout is in my calendar for that day it automatically shows up on my Garmin. Once I turn my Garmin on, I press “Start today’s workout” and I start pedalling.
If today’s workout not on my Garmin, a click of the “Sync with Garmin” button, then a quick pairing of my Garmin why my phone and I am ready to go!
Conclusion
If you hadn’t jumped into the world of indoor training before, you’re probably still kind of confused over this whole indoor trainer thing. That’s ok!
My suggestion is to choose 1 or 2 factors that are most important to help you narrow down which category to look into. Your local bike shops are great resources for the models that they carry. Also, consider buying used as with technology improving every year, other riders are selling their lightly used set ups for cheap once a latest and greatest hits the market. Just like bikes!
If you only have a full suspension mountain bike (full suspension bikes do not give a great indoor riding experience, espicially if you cannot lock out the suspension) and don’t want to get another bike a spin bike or bike simulator are both great options to go for.
If you have any questions before buying a stationary trainer, please reach out by email (alpinemtbtraining@gmail.com) and I would be happy to help out.
.png)
Athletic Therapist
Performance Specialist
Obsessive Mountain Biker
Founder of Alpine MTB Training
If you are needing any help on the performance side of your mountain biking goals please check out the I offer Coaching Plans to help mountain bikers maximize their on-bike performance through comprehensive coaching and training.
I also offer pre-built Training Plans to give structure to your training. Check them out and please reach out if you have any questions about coaching or training plans.
![]()

![]()